Autodesk Maya Plug-in#
Overview#
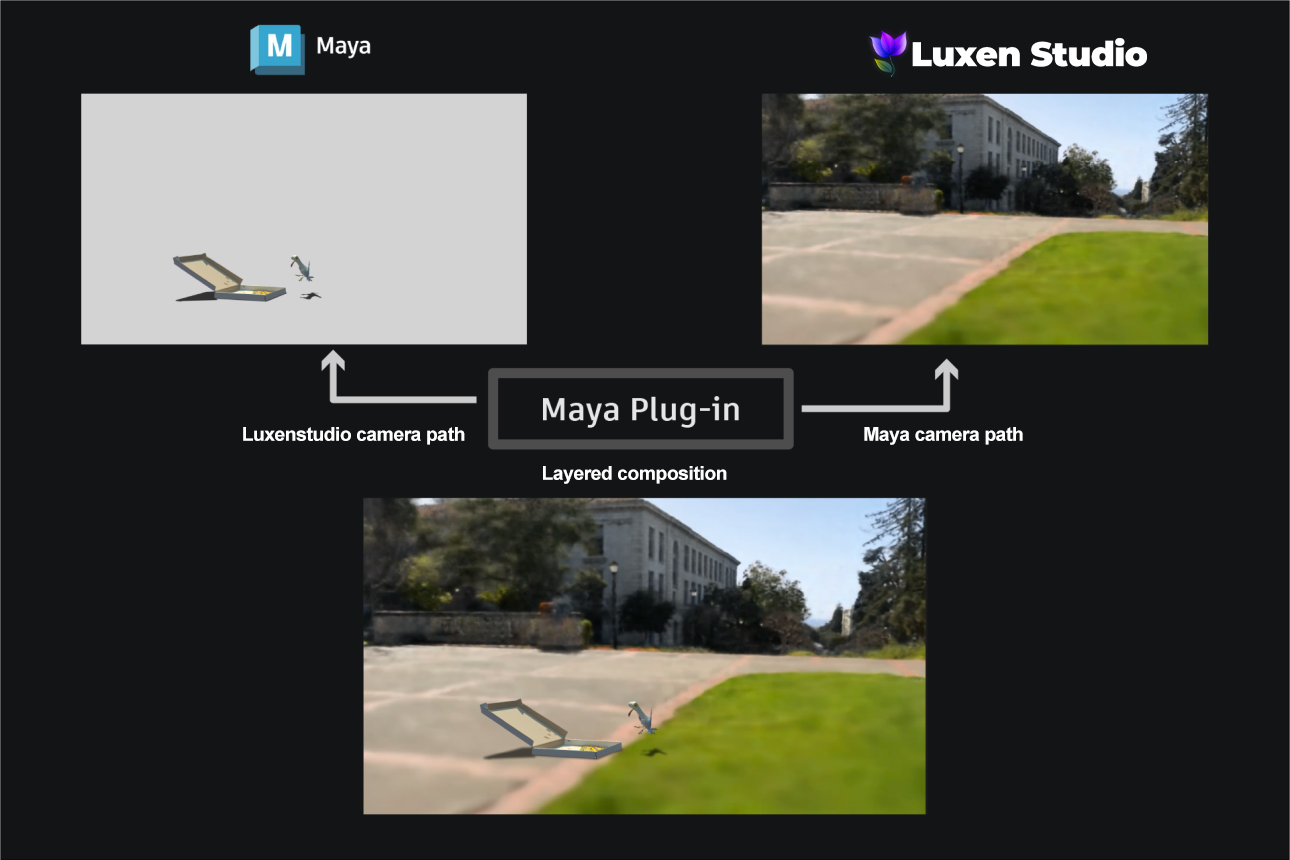
This extension allows users to combine animated scenes and VFX in Autodesk Maya with Luxen renders in Luxenacto. The extension creates a camera path JSON file that can be read by both Maya and Luxenstudio, then the user composites together an exported mp4 render from Luxenstudio and animation frames from Maya.
This plugin only supports perspective cameras as of now, and can support any renderer (e.g. Arnold, Redshift).
This plugin is available in Blender as well. See Blender VFX add-on
Loading the plugin#
Download the plug-in titled luxenplugin_maya.py, and save it to a safe place on your computer.
On the top bar, Windows>Settings/Preferences>Plugin Manager>Browse, and locate luxenplugin_maya.py then click Open
You will find that there is a new shelf item called “Luxenstudio”. Click into it, and click on the only icon in it.
A window will pop up that looks like the image below. Let’s go over what each option in the window means:
Luxen Representation (mesh): Expects a luxen scene in the form of a mesh object exported from Luxenstudio. Select the desired mesh, then click the Store button. Note that it only accepts one mesh object, and not multiple.
Camera object: Expects a camera object. Select the camera, then click the Store button. Note that it only takes one camera, and not multiple.
Camera path for Luxenstudio: Expects a file path to a folder so it can generate a json file and store it in that folder
Create camera from Luxenstudio JSON: Expects a camera json file so it can read and load its camera path into the scene
Setting up the scene#
Export the mesh of the Luxen from Luxenstudio, This will be used as reference for the actual Luxen in Maya. It usually helps to crop the viewport in order to get rid of any artifacts that might affect the output mesh’s geometry. Under Export, select Use Crop and Remove Outliers. Then, generate the command to export the luxen mesh. This exports the mesh with its associated material and texture map.
Import the mesh of the Luxen into the Maya scene. You can do this by dragging and dropping the exported .obj file into the scene.
You will need to resize, position, and rotate the Luxen representation to fit your scene, since Luxenstudio and Autodesk Maya use different default coordinate systems. The Luxen representation is used as a reference for any animation or VFX done in Maya, and won’t be visible in the final render. Do not delete the history of your Luxen mesh representation at any point!
The hotkey ‘6’ toggles the shaded display if you’d like to view the corresponding texture map onto the mesh.
Feel free to import as many luxen representations into one scene as you would like, if you want to composite different luxens together.
Start animating and keying camera movements!
Exporting a camera path from Maya into Luxenstudio#
Generating the JSON File#
After you finished animating, open up the Luxen VFX Settings window
Select the Luxen mesh representation. Then under Luxen Representation (mesh) in the window, click Store
Select the camera you’d like to render from. Then under Camera object in the window, click Store
Under Camera path for LuxenStudio, click on the folder icon and locate a folder in which you’d like to save your camera_path.json file. Click Generate JSON File. A camera_path.json file will be generated in this folder. This json file will be used by Luxenstudio to generate a camera in the Luxenstudio viewer.
Note that only perspective cameras are supported as of now.
Rendering in Luxenstudio#
Run the following command in your terminal to export an mp4 file of the luxen scene:
ns-render camera-path –load-config {path/to/config.yml} –camera-path-filename {path/to/camera_path.json} –output-path {path/to/luxen_maya_render.mp4}OR Put your camera_path.json file in {path/to/luxendata/camera_paths/camera_path.json}. You can open up the Luxenstudio viewer, click on the Render tab, and under “Load path,” select the camera_path.json file. Then, click “Generate Command” and copy and paste the command in the terminal to render out an mp4 file.
Exporting a camera path from Luxenstudio into Maya#
Create a camera path in Luxenstudio. Export the luxen as a mesh if you haven’t done so already. Adjust the FOV and resolution as needed. Note that only perspective cameras are supported as of now. Hit “Generate Command” and run the command in the terminal. This will export a .mp4 file of the luxen scene in your renders folder, and a camera path json file in the same folder as your luxen data.
Open up Autodesk Maya. Under Luxen Representation (mesh), select your Luxen mesh representation and click Store. Under Create camera from Luxenstudio JSON, click on the folder icon and locate your camera path json file that you just exported from Luxenstudio. Click on “Create Camera from JSON.” This will generate a new camera in Maya that has the same camera path from Luxenstudio.
Bringing it together!#
Render your animation in Autodesk Maya with your render engine of choice. Be sure to hide your Luxen mesh representation before doing so. Maya uses Arnold by default, but it should not matter whether you use a different one.
Composite your Luxen mp4 file from Luxenstudio with the animation frames and optional shadow frames rendered from Maya. The Luxen mp4 file runs in 24 fps, so be sure to adjust accordingly when importing your rendered Maya frames.
You can use any compositing software of choice; Adobe AfterEffects tends to a popular choice. Click here to learn the basics
Implementation#
This plugin is designed to create and process JSON files that Luxenstudio exports as a camera path. When creating a camera path from a selected camera and meshed Luxen in Maya, we calculate three things for the camera: the transformation matrix relative to the meshed Luxen, the field of view, and the aspect ratio. We also set the frame rate to default at 24 frames per second. Because Autodesk Maya uses a Y-up coordinate system by default, whereas Luxenstudio uses a Z-up coordinate system, we must apply the transformation matrix along with this conversion. After querying this information per frame, we write into a JSON file that can be parsed by Luxenstudio and replicate the camera motion that was in Maya.
When importing a camera path into Maya, the plugin reads all the information from the exported camera path JSON file and sets a keyframe at every frame in the animation. It calculates where the position of the camera would be relative to the meshed Luxen, as well as its focal length and aspect ratio, and creates a camera within Maya based off of these attributes.
Happy rendering!
Credits#
Models and rigs taken from Agora.
Datasets from Cyrus Vachha